
 First I think, how to build a USBasp programmer.But I have n't a usb programmer to flash the firmware to it. Then decided to create a serial programmer and flash the firmware through this programmer to atmega8. My AVR serial programmer will transform hex file to most AVR microcontroller. It can build using few readily available components. This programmer is compatible with popular avrdude software or PonyProg software.
We will be using the serial port for burning. First, we have to develop a burning circuit for it.
REQUIRED COMPONENTS
Resistors : 10k - 2
4.7k - 2
15k - 1
Zener diode : 5.1v - 2
Diode : 1N4148 - 1
Transistor : BC549/48 - 1
9-PIN RS232 female connector
 |
| serial programmer |
Connect the serial programmer with your target micro-controller. Supply external +5V to target microcontroller from your PC's usb port(pin1 is +5V and pin4 is Ground) or from +5V DC power supply.
 |
| atmega8 target microcontroller |
On Linux we install required packages for avr programming:
binutils: Tools like the assembler, linker, etc.
gcc-avr: The GNU C compiler (cross-compiler for avr).
avr-libc: Package for the AVR C library, containing many utility functions.
avrdude: AVRDUDE is a very popular command-line program for programming AVR chips.
LED BLINKING PROGRAM
We are writing first program for the atmega8 microcontroller, which has a 28-pin, 8-bit, RISC architecture.Refer to the datasheet for the various pins of atmega8 AVR microcontrollers.Here is our first porgram ledblink.c :
/* An LED blinking program */
#define F_CPU 12000000UL
#include<avr/io.h>
#include<util/delay.h>
void sleep(uint8_t msec)
{ while(msec)
{
_delay_ms(1); /* ms delay */
msec--;
}
}
main()
{
DDRD |= (1<<PD7);
while(1)/*50 ms delay*/
{
PORTD &= ~(1<<PD7); /* PD7 LOW */
sleep(50);
PORTD |=(1<<PD7); /* PD7 HIGH */
sleep(50); /*50 ms delay */
}
}
Here we use 13nth(PD7) pin of microcontroller as out put pin for led blinking
COMPILATION
Compile the C code using the command below:
avr-gcc -mmcu=atmega8 -Os ledblink.c
which will result in object file a.out Now, we will covert it to hex file, suitable for burning to the microcontroller's memory.
avr-objcopy -j .text -j .data -Oihex a.out ledblink.hex
We are converting it to a hex file because, for burning the code to atmega8, we will use avrdude, whose input file must be a .hex file.
Notice that you can cat the ledblink.hex file.
:1000000012C019C018C017C016C015C014C013C044
:1000100012C011C010C00FC00EC00DC00CC00BC06C
:100020000AC009C008C011241FBECFE5D4E0DEBF5E
:10003000CDBF0DD01AC0E4CF07C0E7EBFBE031978E
:10004000F1F700C0000081508823B9F7089581B30B
:10005000806C81BB82B38F7382BB82E3EDDF82B39E
:0E006000806C82BB82E3E8DFF5CFF894FFCF1F
:00000001FF
:1000100012C011C010C00FC00EC00DC00CC00BC06C
:100020000AC009C008C011241FBECFE5D4E0DEBF5E
:10003000CDBF0DD01AC0E4CF07C0E7EBFBE031978E
:10004000F1F700C0000081508823B9F7089581B30B
:10005000806C81BB82B38F7382BB82E3EDDF82B39E
:0E006000806C82BB82E3E8DFF5CFF894FFCF1F
:00000001FF
BURNING THE CODE
Now, we will burn ledblink.hex to the target atmega8 microcontroller
avrdude -p m8 -c ponyser -P /dev/ttyS0 -U flash:w:ledblink.hex
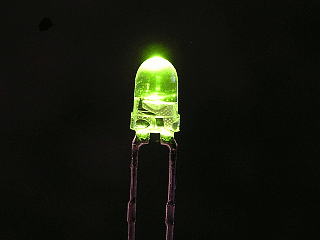
Connect an LED with 1k resistor to pin 13 and grounded it.

Notice that you can see the LED at pin 13 blinking.
*****Happy Coding*****
No comments:
Post a Comment